
The Hub blog
Do you know Bubble? A short review of Bubble, the newcomer to No Code
Bubble, the new kid on the block
“New York start-up Bubble announces a $100 million Series A funding round”, TechCrunch revealed in an article published on 27 July.
Thanks to this new funding round, Bubble wants to develop its no-code platform by adding new features, so it can keep meeting the needs of its current customers and potential new ones.
Bubble has enjoyed a meteoric rise since it was founded in 2012. The basic idea was to let anyone, developer or not, build a website or an app. The bet seems to have paid off, since more than a million people around the world already use Bubble.
Incredible, isn’t it?
If Bubble intrigues you, stay with us! Today, the Dgitags team brings you a review of this trendy new tool to help you discover its main features.
We hope you enjoy the article. Let’s go!
Introducing the tool

Bubble is a tool for developing mobile and web apps without coding, with no tedious HTML or CSS programming. This platform lets users create and customise apps through a user-friendly interface using drag and drop. It makes coding obsolete and democratises the creation of innovative apps. More than 750,000 users build and launch their business on Bubble.
The objectives
- Develop: you can build any web app without code. Bubble lets you create interactive, multi-user apps for desktop and mobile web browsers.
o Customise the UX: you can understand what happens as users navigate your app, click by click. Thanks to dynamic containers and the comprehensive library of visual elements, it’s easy to create real-time news feeds, chats and other interactive elements.
o Manage data and accounts: for example, you can set up user accounts and enable logins using passwords or OAuth 2.0-compatible platforms such as Facebook, LinkedIn or Google. Every Bubble app comes with a ready-to-use user management system.
o Use integrations: you can fully extend your Bubble app with JavaScript plugins or connect to any API with our no-code API connector.
- Design: you can enjoy total design freedom.
o Drag and drop: you can create pixel-perfect designs and insert images, icons, videos, maps, etc. without any knowledge of HTML or CSS. Use the responsive editor to build apps that adapt perfectly to mobile browsers.
o Use dynamic content: you can display user-generated content or data retrieved from services such as Stripe, Google and Facebook. Change the typography, colours or visibility of any element on the page based on information provided by your app, thanks to our dynamic elements.
o Change the interface language: you can translate your app’s text and automatically display the right language, currency and formats. You have access to more than 80 international languages, and it’s easy to add others.
- Hosting: Bubble takes care of deployment and hosting securely. There are no strict limits on the number of users, traffic volume or data storage.
o Scale your app: as your user base grows, increase your resources and move from a demo app to a web-scale business without any technical changes. You won’t pay more than what you use at the start.
o Version control and backups: safely test changes on a private development version of your site, merge the changes, then deploy them live to users in a single click. Instantly roll back to any point in your app’s history if you need to make revisions.
o Stay secure and private: keep your collaborators and users safe with free, automatic SSL certificates for all Bubble websites.
- Grow: build an engaged customer base with features such as email and SEO that integrate with the tools you’ll use. Analyse your users’ behaviour to make better decisions as your product and business evolve.
o Customer analytics: identify the most-used parts of your app with our powerful dashboards and connect to the most popular analytics and customer management services, such as Mixpanel, Google Analytics or Segment. You’ll be able to check the most viewed pages, real-time workflows, the most viewed products, etc.
o Grow your audience: send customisable transactional emails to users and integrate them with email list management services. Control SEO by setting meta tags, customising URL text and titles, and generating sitemaps.
o Payment processing: integrate Stripe and Braintree with Bubble to support complex payment models, including subscriptions, deferred payments, third-party transactions, etc. You can build a shopping cart for your e-commerce site or create a crowdfunding platform.
- Collaborate: give any member of your team the ability to make changes and provide feedback on the project in progress.
o Up to 40 collaborators: bring together up to 40 teammates who will work with you on your app, with customisable permissions and access rights. Everyone can take part, without needing to write code.
o Work at the same time: you can see what your collaborators are changing live. You’ll be able to give feedback on their work in real time through notes or comments.
o Secure and protect: add a password to your app so you can share it selectively before publishing it.
Did the features interest you? If so, stay with us. We’ll now move on to installing and using Bubble.
Installation
1/ Launch Bubble on your computer
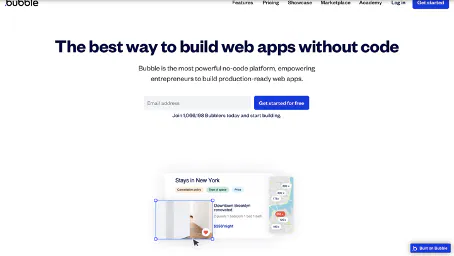
2/ Sign up or log in
If you need to sign up, the screen will look like this:
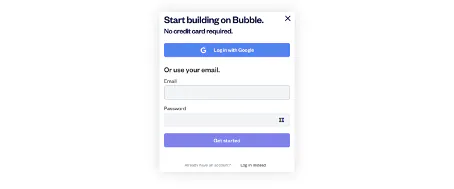
You can sign up in two ways:
- By entering your email address
- By using your Google account
If you need to log in, the screen will look like this:
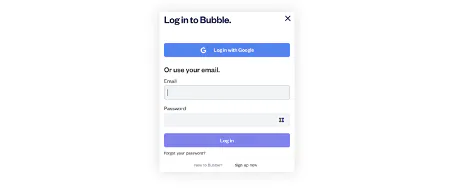
Let’s start using it!
Using Bubble
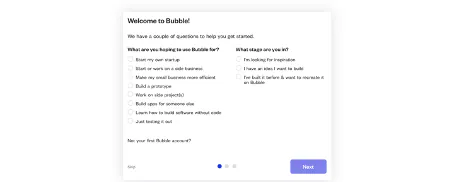
Once you’re logged in or signed up, you can start using Bubble. A few questions will appear. Once you’ve answered them, click “Next” (you can skip this step by clicking “Skip” at the bottom left of the white box).
Once this step is complete, you arrive at Bubble’s user interface.
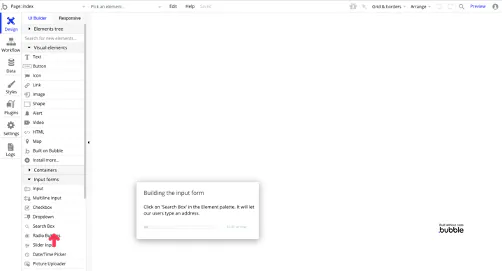
There are 3 toolbars you need to know to use Bubble:
1/ On the sides: you have the element library: design, styles, database, plugins, workflow, etc.
2/ Dynamic: element properties.
3/ Settings: main options, for example: domain, languages, SEO, passwords, sub-apps, etc.
Even in the free version, users have access to a large number of different elements that can be used to build their web app.
Thanks to the API feature, users can create integrations with third-party web resources for data exchange. For example, you can connect custom scripts such as JavaScript or Python.
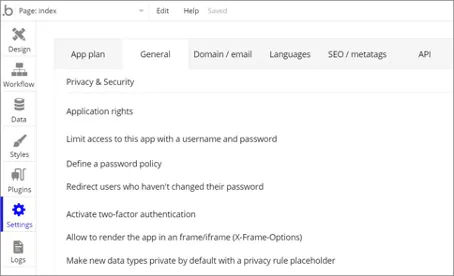
You can also use plugins: interface elements, payment services, forums, etc. Bubble’s plugin library contains thousands of different add-ons and integrations.
All of Bubble’s tools can be divided between the back end (algorithms and databases) and the front end (the visuals). Bubble also has tools for hosting and SEO, since it is mainly intended for building web apps. You’ll also have access to the source code, so in the event of an outage, for example, data can be restored.
Next, let’s explain the front-end tools.
Design
Most of the tools you’ll need to manage the front end are in the Design section. You’ll need to use the “drag and drop” principle. For example, when you drag an element, you’ll see its size in pixels and guides along it. Layers are also possible, so elements can be placed on top of one another without any problem.
From the top panel of the working window, you can undo the last actions carried out on the interface, change display options or adjust the scale.
You can manage the different working windows as if they were separate pages of the site. Don’t panic! If you make mistakes, there’s a change history that records every action taken and lets you go back if needed.
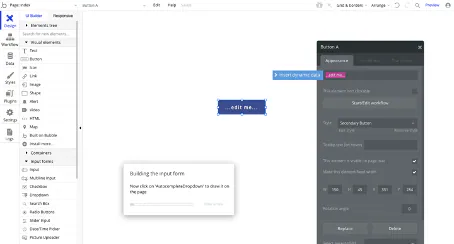
A tool that’s likely to come in very handy is the preview tool. Before publishing your app, you can see what your creation will look like. All changes can therefore be viewed and tested before final publication.
In addition, you can use the Responsive tab to get a preview on different devices.
As soon as you place an element on your interface, you can change its properties using the element’s settings panel. Just click on it. This panel lets you control the size, settings or even transitions of the element in question.
In the example below, I went into Design, then clicked “button”. The black panel appeared when I inserted the button into the interface. Using this black box, you can make changes to the button.
Styles
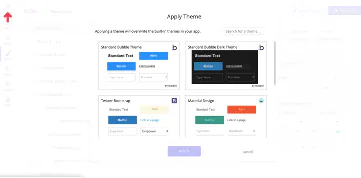
Bubble lets you customise every element of your interface. Many styles are available by default, and you can create your own. These options save you time, since the same style can be used across several elements or windows. There are also ready-to-use themes you can find in the official store.
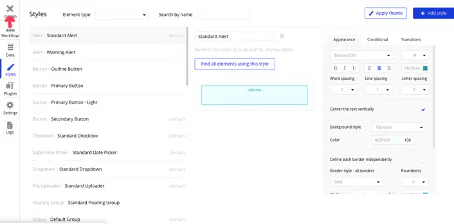
The options available:
1/ Text: font, size, colour, spacing, alignment.
2/ Background: solid colour, gradient, image.
3/ Frame/workspace: inner and outer margins.
4/ Conditionals: complete or partial changes in certain scenarios.
5/ Animations: transition options available.
To add a style, click “Add Style”. To add a theme, click “Apply theme”.
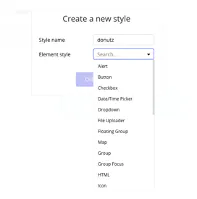
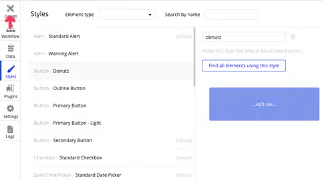
Your new style will appear in your workspace.
Workflow
The back end is the invisible part of apps. It’s all the elements you need to create, which make up the skeleton of your app, so to speak.
In Bubble, these elements are located in the workflow section and are called “events”. They are the main way of organising interaction with visitors.
For example, you can implement tasks such as triggering events, managing databases, setting up logic algorithms, etc.
Organising an event is done in two steps:
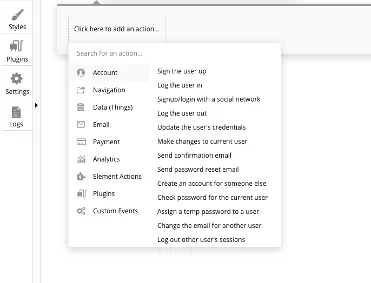
1/ Step one: creating events
Events have a two-level hierarchy of elements:
- an event linked to a specific condition sits at the top
- a chain of actions sits below it
In reality, Bubble has adopted the If-Then principle, which limits the ways in which app logic can be organised.
To solve this problem, Bubble added the ability to create plugins and connect them to the project structure via an API.
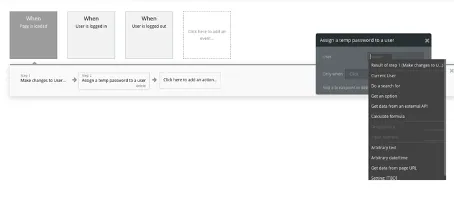
2/ Step two: connecting to the event
You can only configure connections to the event after establishing a step-by-step chain of actions in the event manager.
We recommend creating an event using the corresponding button in the element editing panel and establishing the relationship from the start. Actions will be executed step by step, so make sure the data is available at every stage of execution.
Data
When you create a table with fields, it forms a database. Databases have been the foundation of apps and websites for years. Bubble’s strength has been precisely to minimise coding even in this area, making creating a database faster and simpler. The database editor and the rights management system are powerful enough to configure access and hierarchies.
To create your database, you need to go through 3 steps:
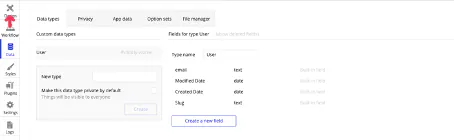
1/ The data type editor:
A data type is a standard for defining certain data you need to enter in a table. This affects, first of all, the final size of the database, which in turn determines the speed of queries and responses. It also makes the data readable by events.
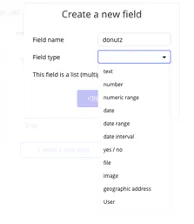
Bubble has more than 10 ready-to-use data types: String, Int, Timestamp, etc., which can be extended with custom types.
2/ The field editor:
This editor lets you create new fields or modify existing fields in databases. You can also use it to read and search for values.
3/ The table editor:
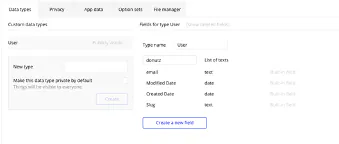
This last editor is combined with the field editor. It doesn’t really have precise limits. Nevertheless, it contains all the actions that affect a table as a whole. For example, you can use certain data such as ID or Name in different tables. In addition, on Premium plans, importing and exporting data in CSV format is available.
Plugins
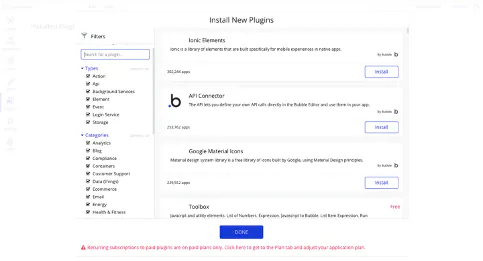
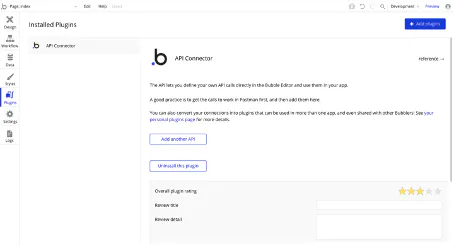
You can add plugins using the “Plugins” tab on the left-hand side.
Logs
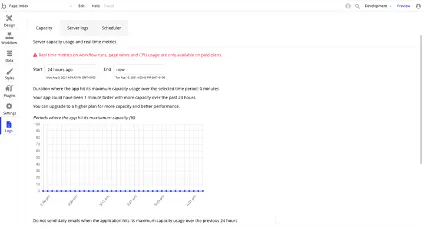
The information in this tab is only available in the paid versions. These are statistics such as the number of views of your page.
Building a website
We’ll now show you how to design and launch a main home page for any company.
Step 1: Create a new project
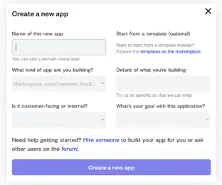
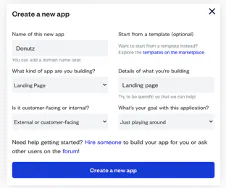
First of all, you need to create a new project. On Bubble’s home page, you’ll find a “Create a new app” tab. Click this button and fill in your company’s name, type, objective and description. The name can’t contain spaces or special characters, because it will be used to create a website URL. The domain will look like, for example, donutz.bubble.io. Paid subscriptions let you customise domains.
Step 2: Choose your interface
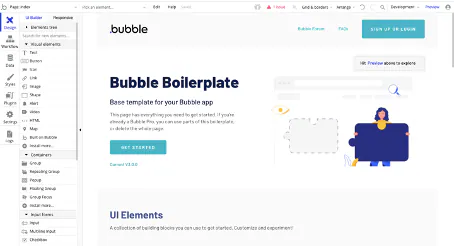
In the next step, the app assistant appears. You can follow its guidance to better understand how Bubble’s tools work. It lets you choose a design template based on users’ answers. You can choose the “Start with a blank page” option or use the template suggested to you.
If you choose the ready-made template, you’ll just have to change the text, typography and images, i.e. the visual elements.
If you choose to start with a blank page, see the next steps.
Step 3: Start building
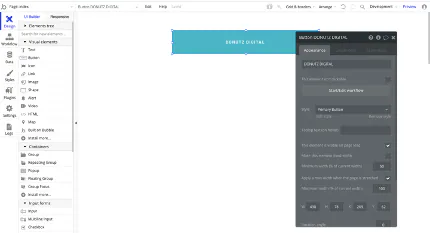
We’ll start by creating a page header made up of our company name. To do this, click “Button”. When your app is available, you’ll be able to define clickable elements. You can change the header’s position by dragging it with your cursor. The black box that appears lets you manage certain settings of the element, such as its size, position, rotation, etc. If you want to change the element’s style, you need to go to “Styles”.
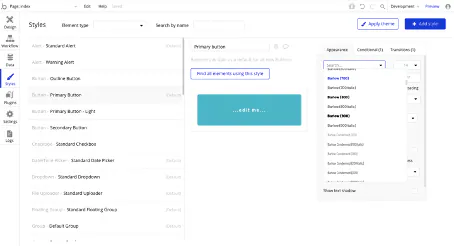
Step 4: Add an image
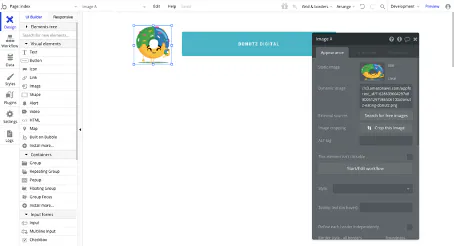
You can add an image by clicking “Image” on the left.
Step 5: Add elements
You can add a video, text, a map, etc.
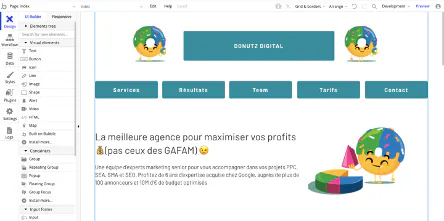
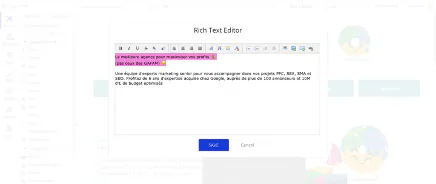
When you add text and want to edit it, the “Rich Text editor” appears. You can, for example, change the colour or size of the text.
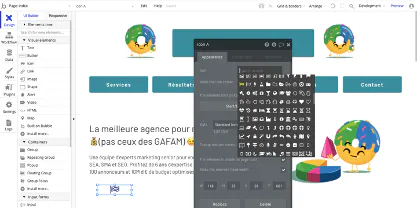
Adding an icon:
The finished home page:
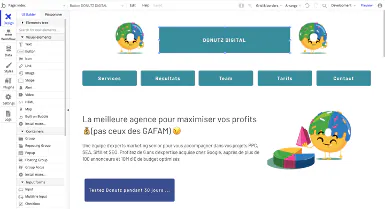
And there you have it, our design is ready. Honestly, we’ve created a very simple home page just to show you the basic features.
To test or debug it, it’s best to use preview mode. A go-live button is available in the top right-hand corner.
The marketplace
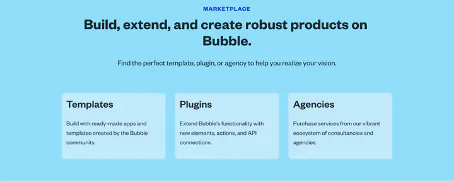
In the marketplace, you’ll have access to a wide choice of templates: apps, showcase sites, e-commerce. Select the template that suits you, then create your first web page.
You can also find plugins and agencies there (Bubble has an ecosystem of companies providing professional services, including Bubble app development and training).
Academy
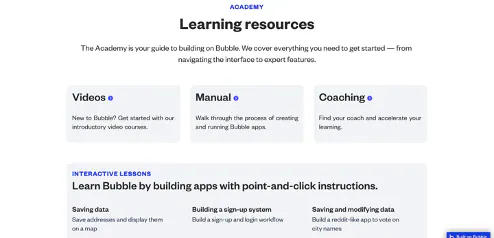
To learn more about using Bubble, you have many resources available in the Academy tab. Some resources are free.
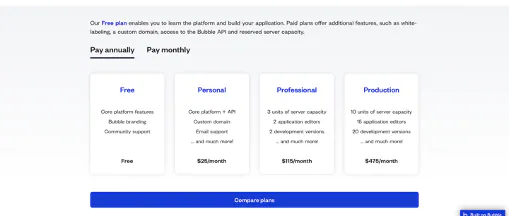
Pricing
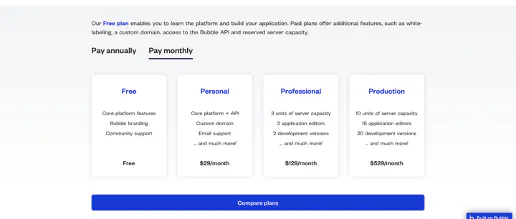
Our tips
Bubble lets you make changes to your website without having to put it into maintenance mode, thanks to the “Switch to Live Database” feature.
Videos
Here are a few videos to help you learn more about Bubble’s features. Don’t hesitate to take a look at Bubble’s Academy tab.
- Video: how to get started with Bubble
- Video: first steps with Bubble
- Video in English on using Bubble
Examples of sites built with Bubble
- Comet
- Qoins
Our final verdict
Bubble has therefore proved to be a very useful platform, since it lets novice users put together a web app without coding skills or additional software, and it lets users with programming skills extend Bubble’s possibilities through plugins and custom scripts. Bubble therefore meets the needs of different types of users.
Bubble’s strengths:
- The interface is easy to understand, intuitive and user-friendly
- Bubble can be used by people with no prior coding experience
- An ideal platform for testing ideas and building MVPs.
- The platform’s price is also very competitive compared with others on the market, making it a cost-effective solution.
- Tutorials available on their site to help you use Bubble’s features.
- There are machine learning plugins you can deploy without writing a single line of code —> a large plugin library.
Bubble’s weaknesses:
- Bubble could be easier to use for creating designs/drawings (for example, some users prefer to create their designs in Figma and transfer them to Bubble afterwards).
- No custom animation scripts for elements
- Database import/export not available on the free plan
It’s a 4/5 for Bubble!
That’s the end of this review. Yes, already… Don’t worry, we’ll be back soon with even more content :)
The Dgitags team nevertheless hopes this article has interested you and taught you a few things about Bubble, this trendy new tool.
See you soon!
Sources:
- G2