
The Hub blog
How to register as an auto-entrepreneur in France
Do you want to set up your auto-entreprise (France’s simplified micro-business status) to become a super freelancer, but don’t really know how to go about it?
Dgitags.io shows you how in a few steps ☺
CONTENTS
STEP 1: the conditions to meet before you start
STEP 2: go to the autoentrepreneur.urssaf website
STEP 3: log in to or create your Urssaf account
STEP 4: set up your auto-entreprise
STEP 5: get your documents
STEP 6: start trading
Let’s go!
STEP 1: the conditions to meet before you start
First of all, there are 4 conditions you must meet to register as a micro-entrepreneur (the official name for the auto-entrepreneur status):
- Be over 18
- Be a French national, or hold a residence permit that authorises you to set up your micro-business
- Not be under guardianship or curatorship
- Not be subject to a ban on managing a business
If you meet these conditions, go to the website: https://www.autoentrepreneur.urssaf.fr/portail/accueil.html
STEP 2: go to the autoentrepreneur.urssaf website
You’ll land on the following home page:
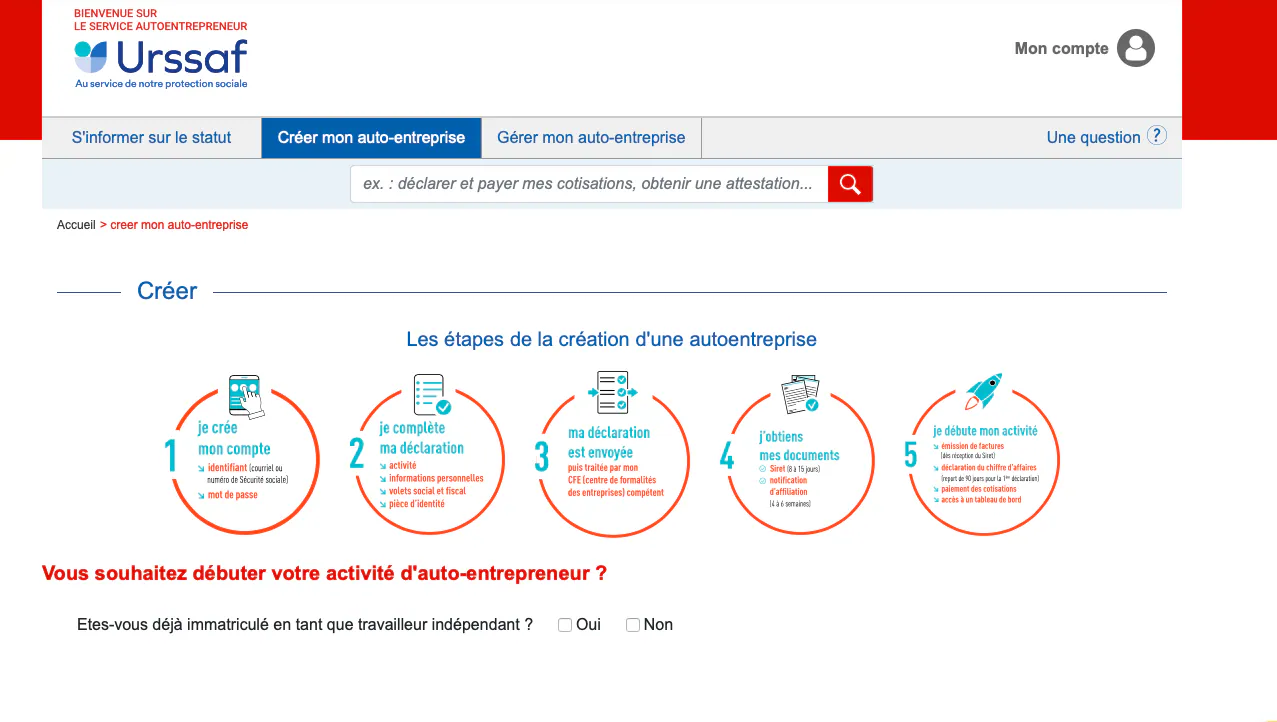
Before starting the procedure, you have to answer the question “Are you already registered as an independent worker?” (travailleur indépendant)
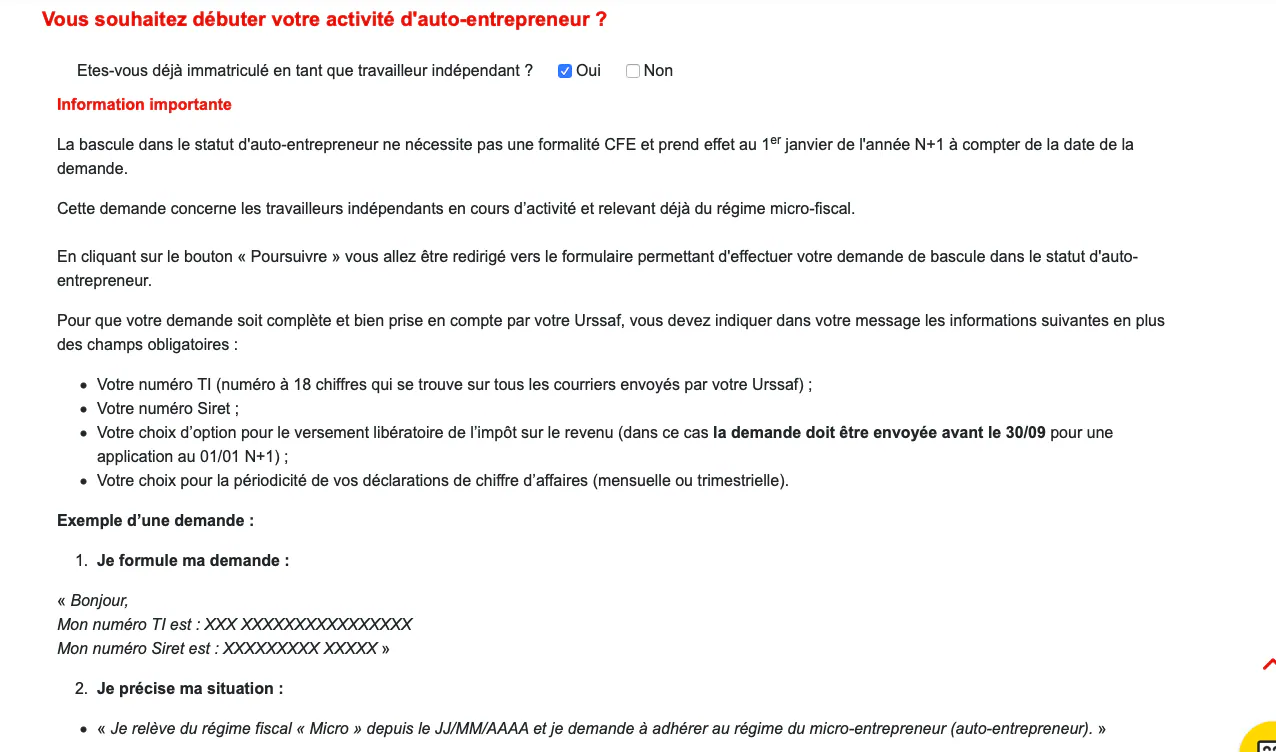
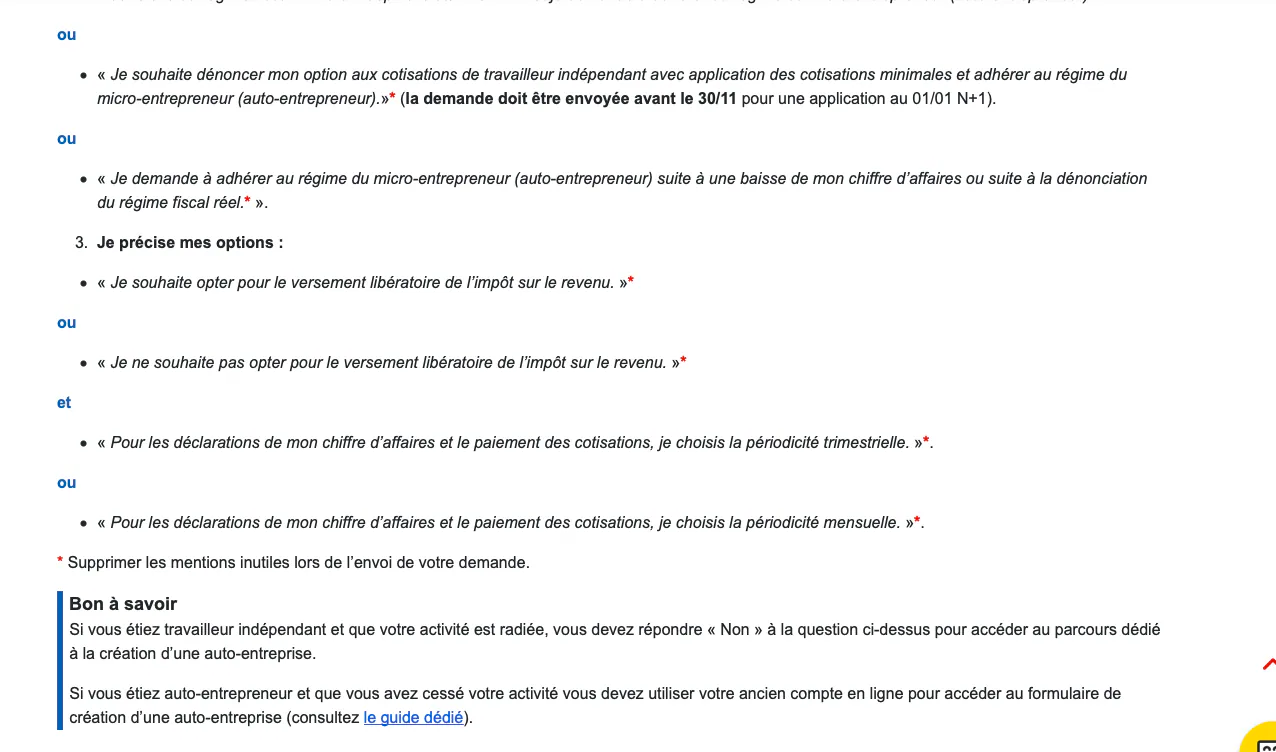
- Answer “Yes”: if you are currently an active independent worker who is not an auto-entrepreneur and you want to switch to auto-entrepreneur status.
You’ll then be redirected to the service that lets you switch from independent-worker status to auto-entrepreneur status.
- Answer “No”: if you are not currently an independent worker outside the auto-entrepreneur scheme. You may already have been an auto-entrepreneur and created an account. Go straight to the “My account” section to log in.
For example, if you answer “Yes”, you’ll see the following text appear:
If you answer “No”, you’ll see the following text appear:
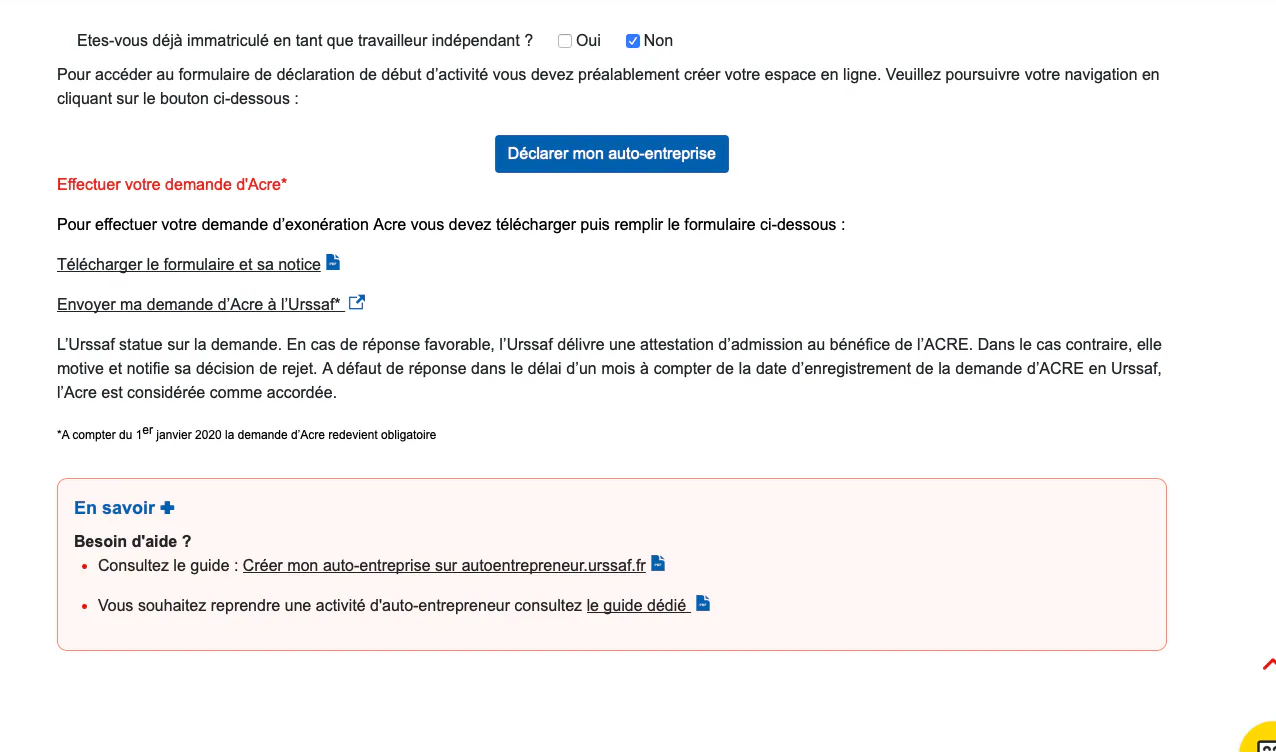
If you don’t have an auto-entreprise yet, click on “Déclarer mon autoentreprise” (Declare my auto-entreprise).
This button takes you to the form for creating an Urssaf account (Urssaf is the French body that collects social security contributions), and then to the form for creating a micro-business.
For information: applying for ACRE
Access the ACRE application form in PDF format and the process for sending the application via the site’s non-logged-in messaging service. The form and supporting documents must be added as attachments to your message.
ACRE (aid for business founders and buyers) is a contribution exemption scheme designed to encourage people to start or take over businesses. Who is eligible? Find the answer here.
The ACRE application must be made within 45 days of declaring your micro-business.
Don’t panic — you’ll find all the information about ACRE on the Urssaf website.
STEP 3: log in to or create your Urssaf account
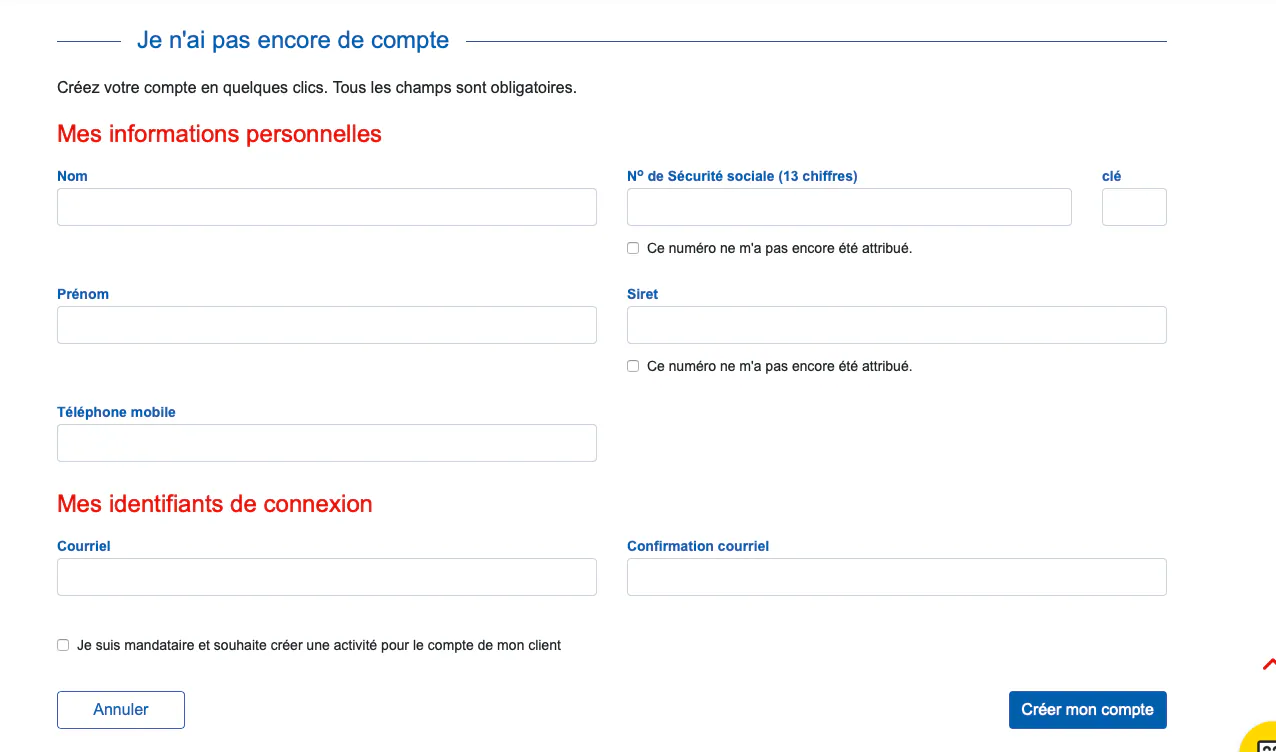
Creating your Urssaf account
If you don’t have an Urssaf account yet, create one by entering your personal details. You won’t have a SIRET number if you don’t have a business.
The SIRET number (France’s business establishment identification number) identifies each of the company’s establishments. It is made up of 14 digits: the nine digits of the SIREN number + the five digits of an NIC number (internal classification number).
If you are an authorised representative responsible for setting up auto-entrepreneur status for someone else, tick the relevant box to access and fill in the part of the form that concerns you as well.
If you later need to log in to that person’s account, remember to use their email address entered in the “my personal details” section (it serves as the login ID).
Once your account has been created, here are the 5 steps to set up your auto-entreprise:
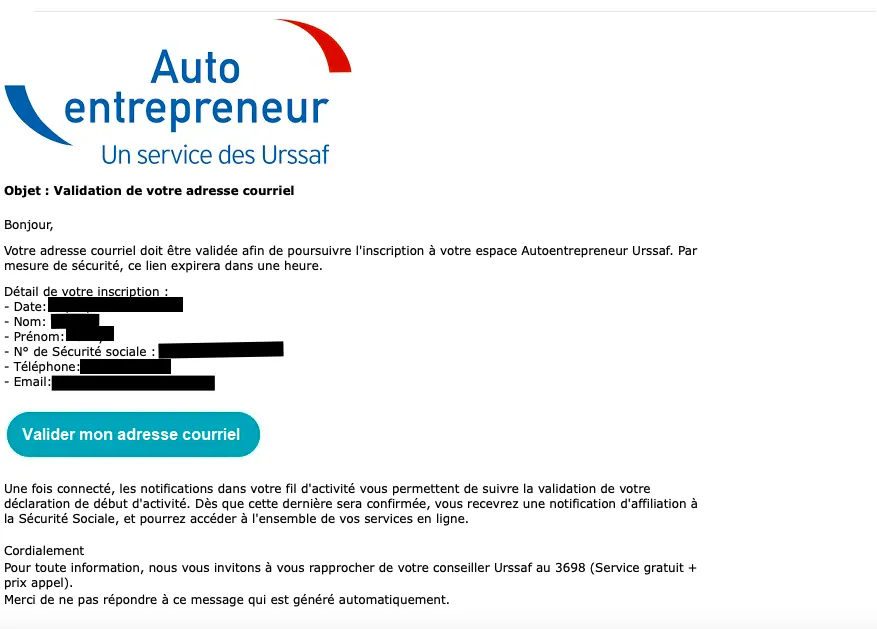
You’ve created your account and received a confirmation email from Urssaf. Click on “Valider mon adresse courriel” (Confirm my email address) to finish creating your account. Once this step is complete, you can move on to creating your password.
Example of the email you’ll receive:
You can now set your password and log in to your account to start the procedure.
STEP 4: Set up your auto-entreprise
You can now start setting up your solopreneur status in 7 phases.
Don’t worry, the steps that follow are very intuitive — you simply need to answer the questions asked. Whenever you’re unsure, small question-mark icons will give you additional information.
The status is really quick to set up, so let’s go!
Phase 1: My auto-entreprise project
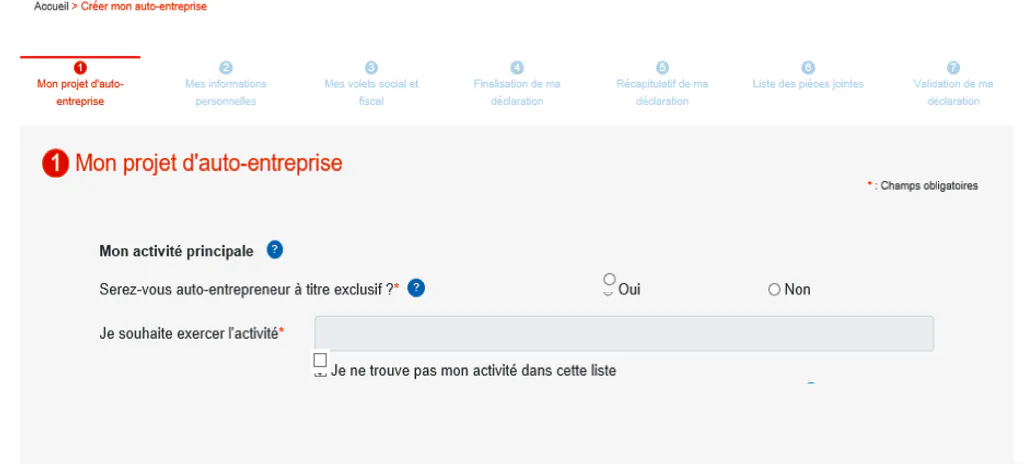
In this first phase, you’re asked to define the activity you want to carry out from a multitude of fields: consulting, marketing, IT, etc.
If your activity falls under Commerce or Crafts, the site will redirect you to “the business formalities centre corresponding to your activity, according to where you work”.
Phase 2: My personal details

You’re asked to answer standard questions such as your postal address, phone number, email address, etc.
Note:
- The email address requested here is the personal email address you use for your personal affairs. It can therefore be different from the professional email address you use for your micro-business activity.
- For the postal address, you can give your place of residence or a business address (commercial premises, for example). It will depend on whether you work from home.
- The start date of your activity must fall between the date you fill in this form and the following 30 days.
Phase 3: My social and tax details
In this section, you’re asked for the frequency of your social security declarations (monthly or quarterly) and your social security number. If you’ve never been assigned this number, tick the box “ce numéro ne m’a jamais été attribué” (this number has never been assigned to me).
Questions about your social security and tax regimes will also be covered.
For example, your social security regime will depend on your situation:
- Case 1: You are, and intend to remain, a salaried worker alongside your micro-business: you’ll stay on the salaried workers’ scheme (the general social security scheme)
- Case 2: Not salaried: you’ll be affiliated to URSSAF.
Likewise for your tax regime, you can choose between a flat-rate withholding tax (versement fiscal libératoire) or standard income tax.
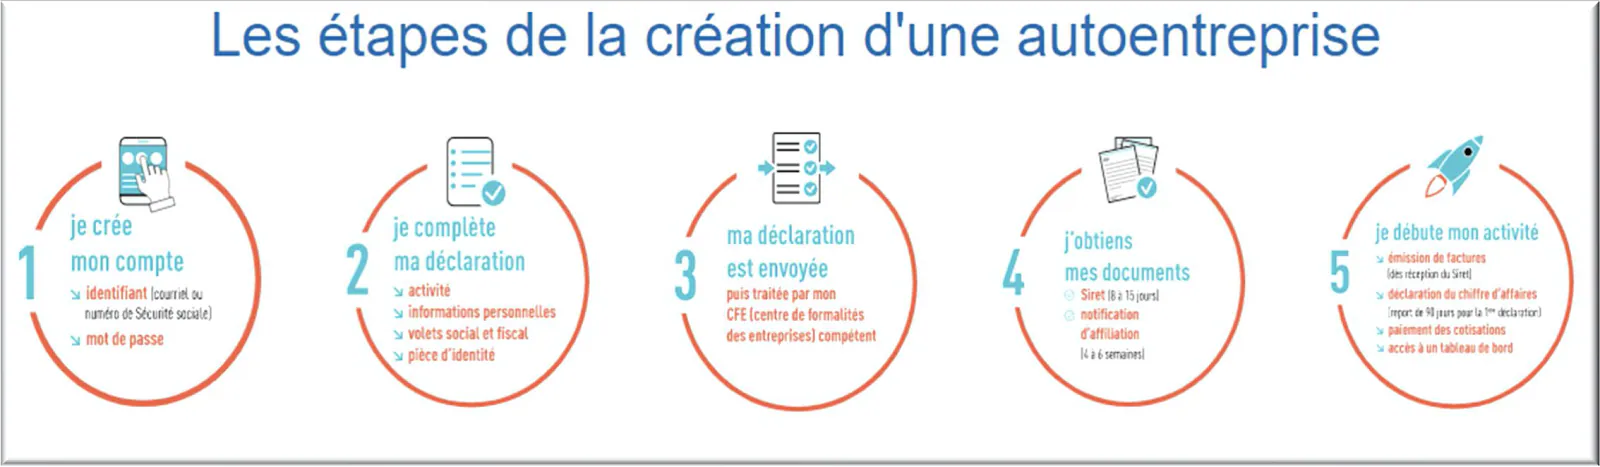
To illustrate the phases described above more concretely, here’s an example of what awaits you:
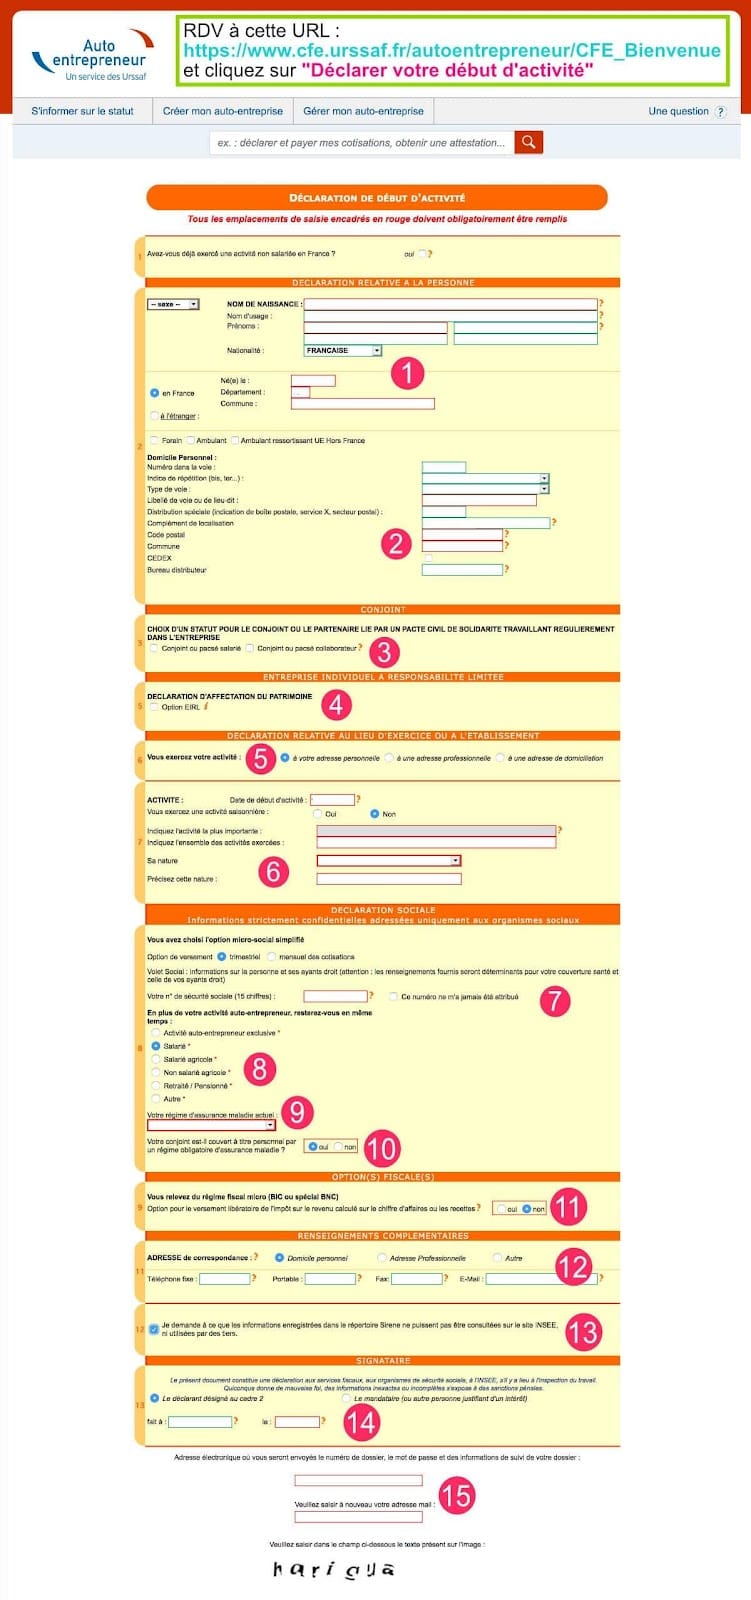
Steps for registering as a micro-entrepreneur
Phases 4 and 5: Finalising and reviewing my declaration
In these phases, you’re asked to check all the information you filled in previously. Read it through carefully to avoid mistakes!
Phase 6: List of attachments
Few supporting documents are required to set up your micro-business. You’ll only need a valid identity card, passport or residence permit.
Make a photocopy of your identity card, passport or residence permit and write the following statement by hand: ” Je certifie sur l’honneur l’exactitude de cette pièce justificative d’identité. Fait à XXX, le XX/XX/XXX ” (I solemnly certify the accuracy of this proof of identity. Done at XXX, on XX/XX/XXX), followed by your signature.
Other documents may be requested if you’re setting up an EIRL/EURL (other French sole-trader and single-member company forms) or depending on your category of activity (e.g. craft activities). Here’s an example here.
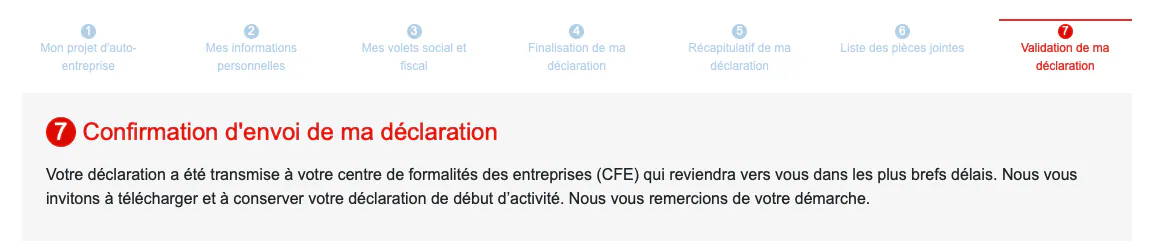
Phase 7: Submitting my declaration
If everything is in order, all that’s left is to confirm the creation of your micro-business.
If you’d like to finish it later, you can always come back to it. Your application will be saved.
STEP 5: Get your documents
Once your declaration has been finalised, you’ll have to wait a few days to receive a letter from Urssaf with your SIRET number, a notice of affiliation to the micro-business scheme and a certificate of registration in the national business directory.
Rest assured, the letter from Urssaf can take more or less time to arrive. For example, mine arrived after 10 days, but in some cases it can take longer.
STEP 6: Start trading
Everything’s in order — you’re officially a solopreneur! You can start working as a freelancer.
To go further:
As an auto-entrepreneur, you’ll probably need to open a bank account and take out professional insurance. Feel free to take a look at Qonto, Shine or Hellobank for online banking, and at Easyblue for insurance.
We hope you enjoyed this article and that it has guided you through setting up your micro-business.
Are you interested in the digital sector and would you like to launch yourself in it as a freelancer? Sign up on dgitags.io
Founded by former Google and Bouygues Telecom team members, dgitags.io is a hub of 1,200 digital talents and studios in design, web marketing and product management.
The acquisition agency Donutz.fr completes this unique value proposition.
To find out more about Donutz, click here.
[

](/en/contact)
Source: